Documentation Index
Fetch the complete documentation index at: https://docs.multex.tech/llms.txt
Use this file to discover all available pages before exploring further.
What is Detachment Setup?
Detachment Setup allows you to link specialized units, departments, or divisions within your Roblox group to specific Discord roles. This creates advanced role management beyond basic rank linking, enabling users to have specialized roles based on their department membership.Detachments are different from regular ranks - they represent specialized units like “Military Police,” “Aviation Corps,” or “Special Operations” that exist alongside the main rank structure.
Step 1: Access Detachment Configuration
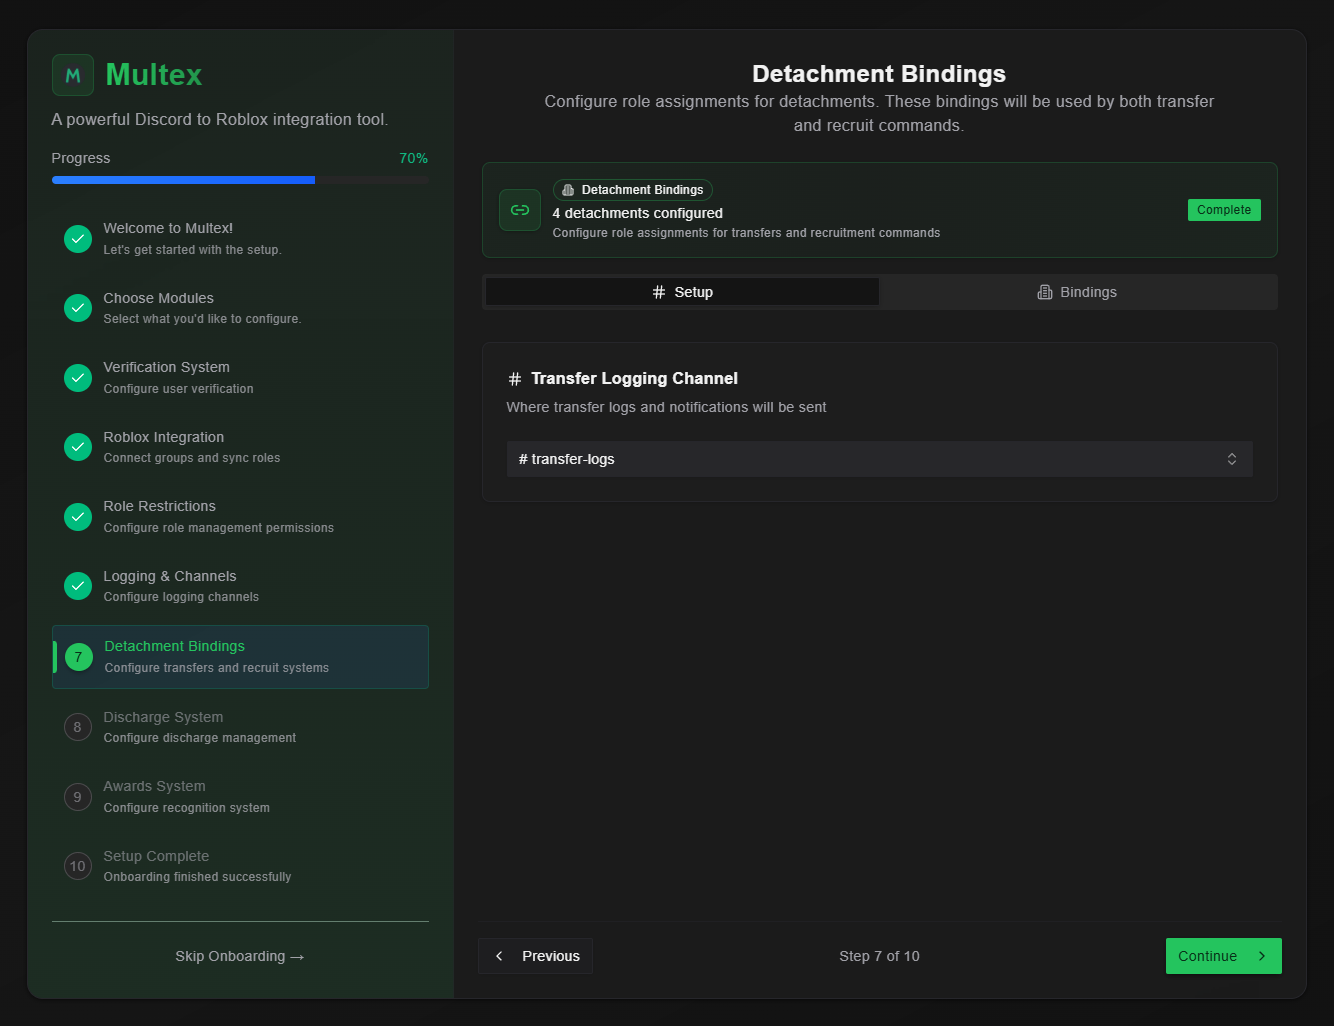
Step 2: View Detachment Bindings Overview
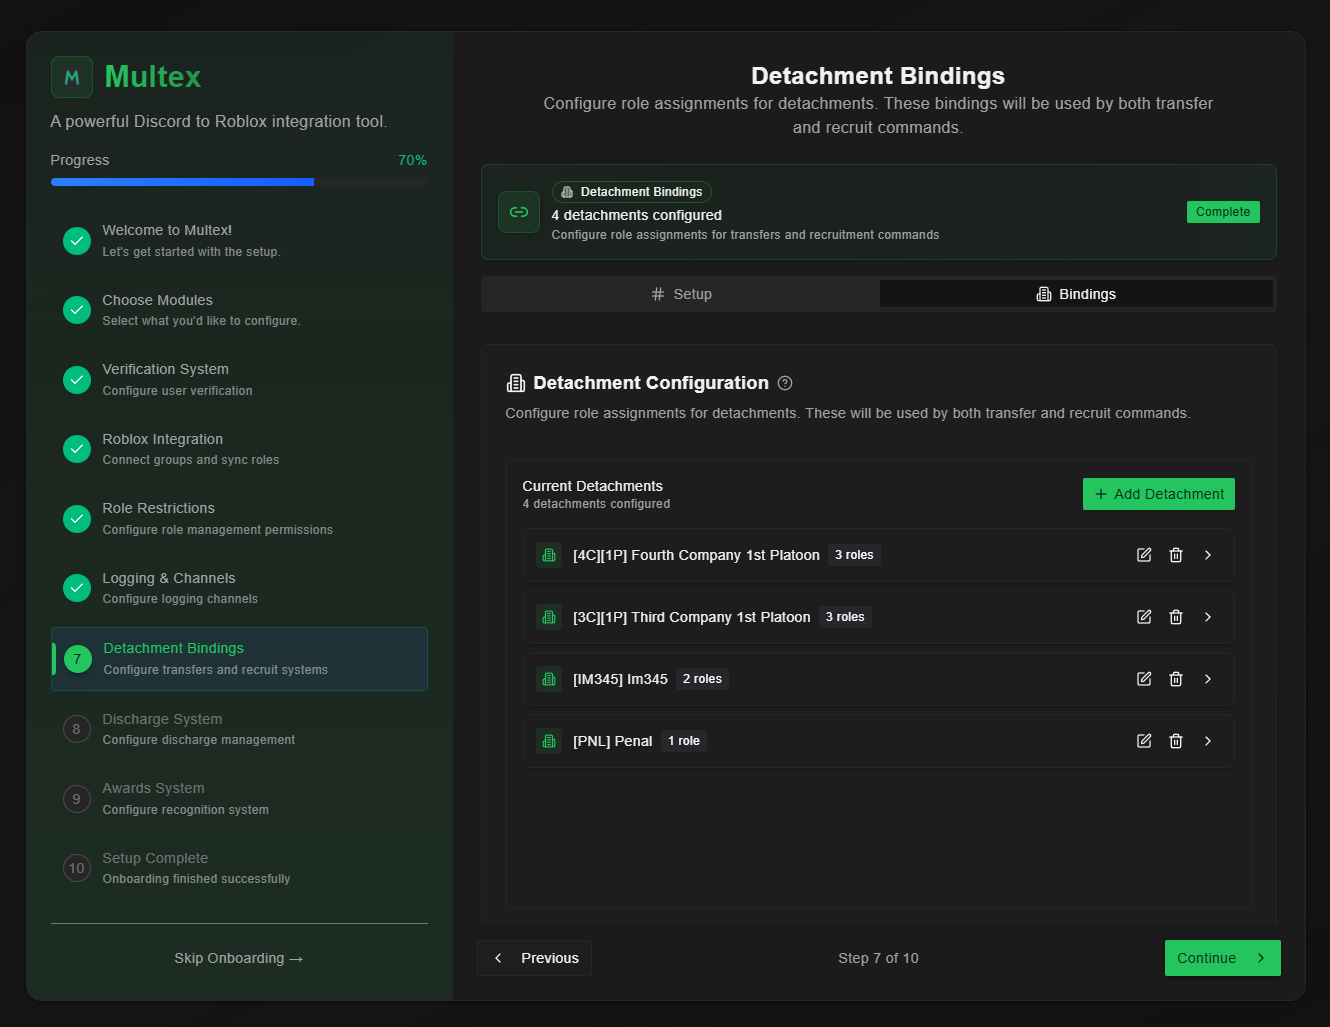
- Active Bindings - All currently configured detachment-to-role links
- Binding Status - Whether each binding is active and functioning
- Member Count - How many users currently have each detachment role
- Last Updated - When each binding was last modified
Step 3: Create Detachment Bindings
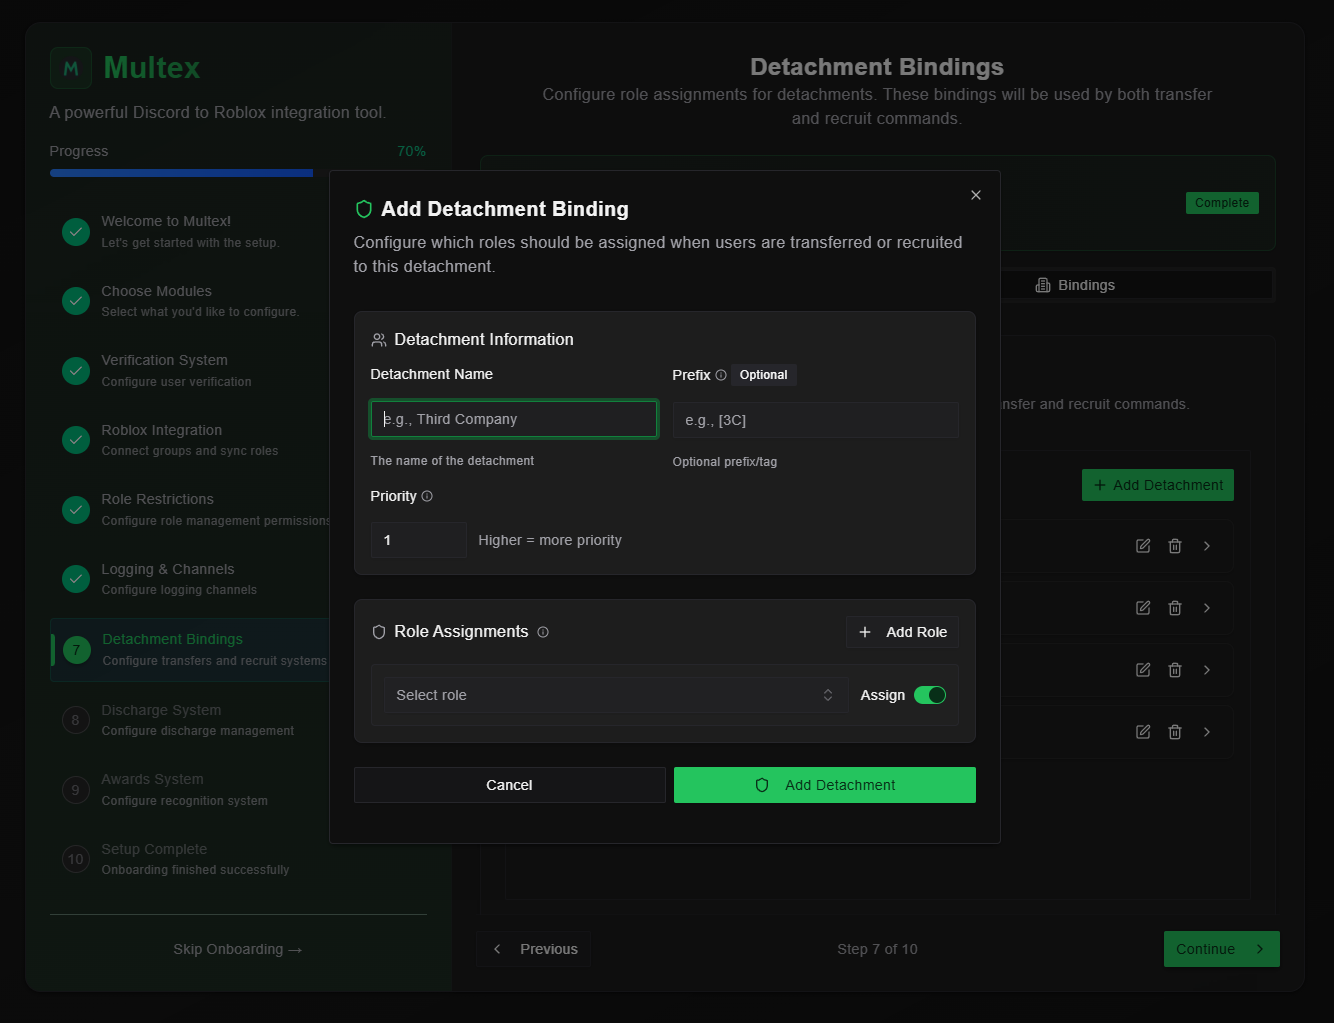
- Click “Add Detachment” to create a new binding
- Give the detachment a name
-
Give the detachment a prefix
- This is used to nickname the user (e.g. [3C] JohnDoe)
-
Give a priority
- Sometimes users may have roles from multiple detachments. This priority gives the bot a hint on which detachment the user actually is in, helping with
/recruitand/transfercommands.
An example for the priority is when a user is in some type of military detatchment who has access to another company. So they have military roles and that secondary company’s roles. In this case, the military detachment binding should have a higher priority because that’s where the user actually belongs. - Sometimes users may have roles from multiple detachments. This priority gives the bot a hint on which detachment the user actually is in, helping with
-
Select roles
- Include all Discord roles that belong to the detachment.
- The “assign” switch will allow that specific role to be assigned or not after
/recruitor/transferis used on the target user.
An example for roles could be Third Company Command, Third Company NCO, Third Company First Platoon, and Third Company. In this case, you want to add all 4 roles into the role assignments but only allow Third Company First Platoon and Third Company to be assignable. - Click “Add Detachment” to save the configuration
Step 4: Edit Existing Bindings
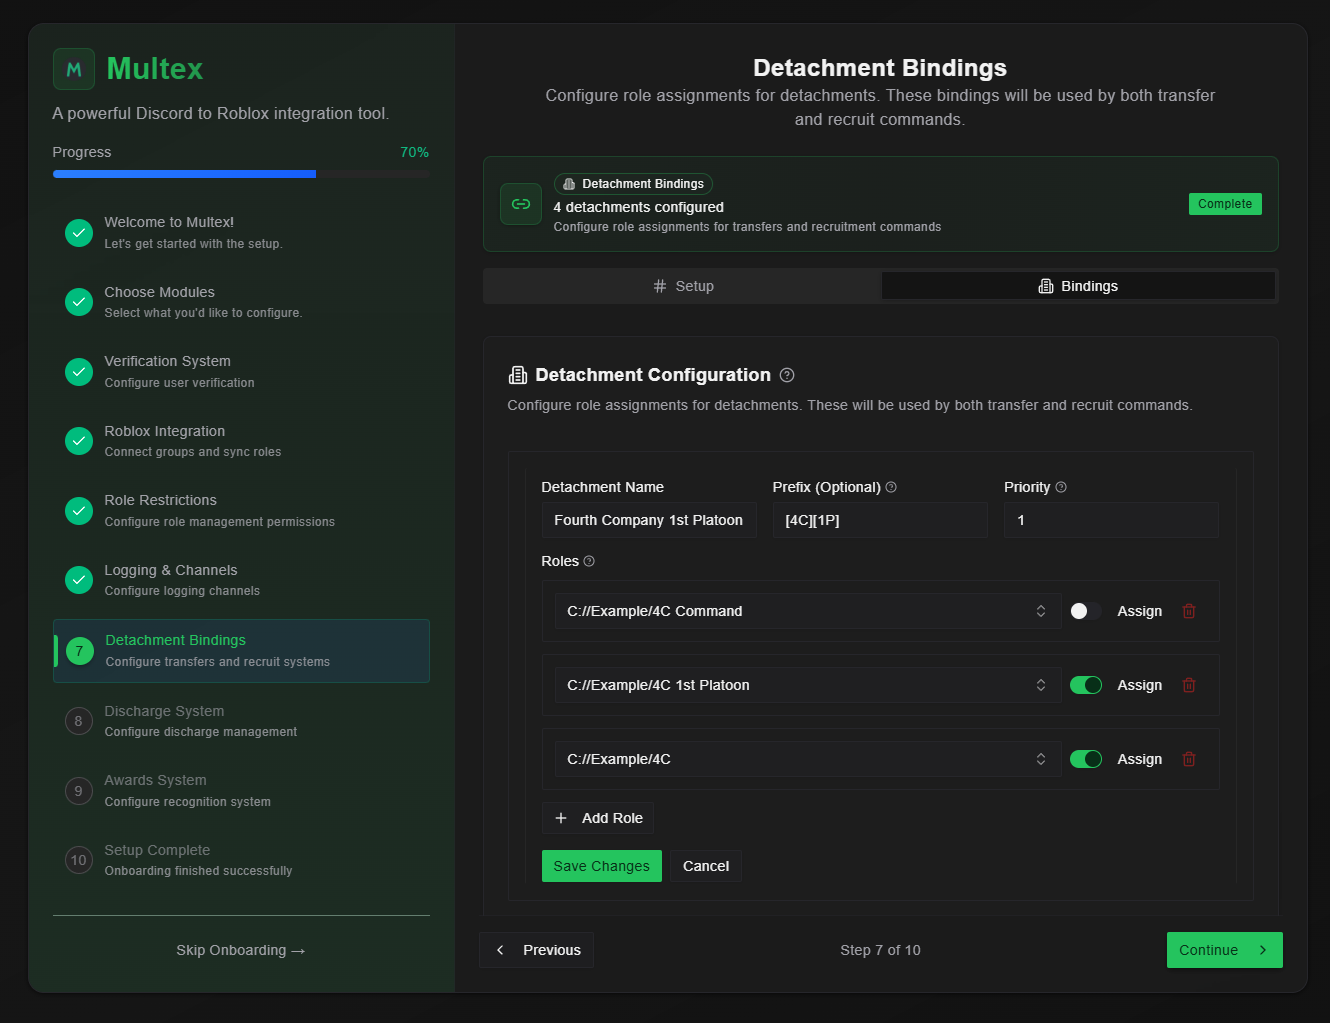
- Changing the name - Change the overall detachment’s name
- Changing the prefix - Change the overall detachment’s prefix
- Changing the priority - Change the overall detachment’s priority for
/recruitand/transfer - Changing roles - Add, remove, or update existing roles and determine if they are assignable or not.
Step 5: Test Detachment System
Before enforcement, thoroughly test your detachment bindings:- Use
/recruit- Add some detachment roles to yourself or another user, ensure the role has permission to use/recruit, then try to recruit someone - Use
/transfer- Add some detachment roles to yourself or another user, then try to transfer an existing recruited individual within the same detachment and try to transfer them to a different detachment.
Transfers only work with individuals within the same detachment, being transferred to a different detachment. This decision was made to prevent detachments, companies, etc from essentially “stealing” recruits from each other.